
How to Decorate Rentals with Art: A 2026 Guide
Table of Contents
- Start with Your Lease: What Renters Can and Cannot Do
- How to Hang Pictures Without Nails in a Rental
- How to Choose the Right Size Art Print for Small Walls
- Renter-Friendly Wall Art Ideas That Transform a Space
- How to Decorate Rentals with Art on a Budget
- How to Decorate Rentals with Art for Neutral Spaces
- Conclusion
- Frequently Asked Questions
Last Updated: September 13, 2026
Start with Your Lease: What Renters Can and Cannot Do
Learning how to decorate rentals with art starts with one document most people never read closely: the lease agreement. This guide from This Artists Dream walks through what leases typically allow, because the difference between a damage-free install and a forfeited security deposit usually comes down to a single clause.
Most standard leases prohibit permanent alterations. That means no nails, screws, or adhesive products that strip paint and drywall when removed. Many agreements also require you to patch and repaint before move-out, and some specify approved hanging hardware outright.
The Uniform Residential Landlord and Tenant Act overview gives a baseline for how states handle property alterations, but your individual lease governs your unit. Read it before you buy a single hook.
How to Hang Pictures Without Nails in a Rental
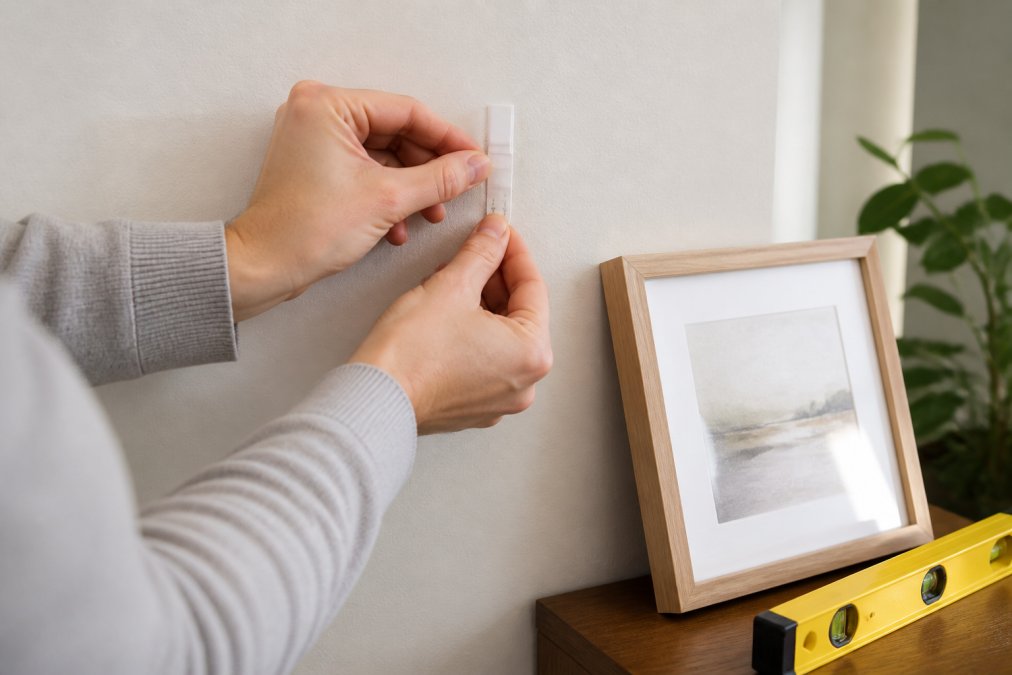
The best no-nail method depends on three variables competitors rarely separate: wall surface, artwork weight, and how long the piece will stay up. Adhesive strips suit lightweight art on smooth, painted drywall for short-to-medium terms. For heavier pieces, textured walls, or anything you plan to keep up for years, you need a mechanical or floor-based approach instead.
Adhesive Strips and Hooks: Weight Limits You Need to Know
Adhesive strips are the default renter tool, but their published ratings assume an ideal surface: smooth, clean, fully cured paint, at room temperature. Real rental walls rarely meet all four conditions, so the effective capacity is lower than the number on the package.
The mechanism matters. Foam-tape strips (the pull-tab style sold under brands like Command) bond through a pressure-sensitive adhesive that creeps under sustained load. That creep accelerates with heat, humidity, and textured or freshly painted surfaces. A strip rated for a given weight on smooth drywall may hold only a fraction of that on orange-peel texture or a wall painted within the last couple of weeks.
A common pattern practitioners follow:
- Match the combined strip rating to at least double the artwork's total weight, including frame, glass, and hanging hardware.
- Use two or more strips per piece and distribute them near the top corners, not the center.
- Keep any single framed piece under roughly 4 pounds on strips alone; above that, move to a mechanical or floor solution.
- Avoid hanging glass-fronted frames over beds, cribs, or seating, where a creep failure becomes a safety issue, not just a cosmetic one.
Installation sequence that actually holds:
- Clean the wall with rubbing alcohol and let it dry fully, dust and kitchen film are the top cause of early failure.
- Press each strip for the full recommended time, typically 30 seconds, with steady pressure.
- Wait the full cure window (often one hour) before adding the frame.
- Remove by pulling the tab straight down and slow, never out and fast. Pulling out is what strips paint.
Tool-Free Mounting Systems for Textured Walls
Textured walls defeat standard adhesive strips because the surface never makes full contact, so the bond forms on the peaks of the texture rather than across the whole strip. Loading up on extra strips to compensate is the most common mistake, and it fails anyway because the contact area per strip is still reduced.
Tool-free options that work on texture:
- Adhesive-backed picture rails or ledges, which spread load across a long horizontal bond instead of a small pad.
- Over-door hooks and over-cabinet hangers, which transfer load to the door or cabinet rather than the wall.
- Freestanding easels, leaning shelves, and floor stands, which remove the wall problem entirely.
- Tension rods inside a bookcase or between two cabinets, used to hang lightweight prints on clips.
For anything heavy, large canvases, mirrors, framed posters over 5 pounds, a leaning shelf or floor easel is the safest renter answer. It also sidesteps the deposit question completely, because nothing touches the wall.
The Security-Deposit Math Most Guides Skip
The reason weight limits matter isn't just safety. It's the lease. Most standard leases classify any wall penetration as tenant damage, and many also treat adhesive residue, paint pull, or a failed strip that takes drywall paper with it as chargeable. The legal dividing line is usually 'normal wear and tear' versus 'damage,' and the two are not the same thing.
A useful framework, drawn from how most state landlord-tenant statutes and small-claims courts treat the question:
- Normal wear and tear: gradual deterioration from ordinary use, faded paint, minor scuffs, small nail holes from a single picture hook in some jurisdictions.
- Damage: anything beyond ordinary use, large holes, torn drywall paper, adhesive residue that won't clean off, dozens of holes from a gallery wall.
The Uniform Residential Landlord and Tenant Act overview gives a baseline for how states handle alterations and deposit deductions, but your individual lease and your state's statute control. Before you hang anything, photograph the wall, note its condition in writing if it's already imperfect, and keep a copy of the lease clause that governs wall hangings.
How to Choose the Right Size Art Print for Small Walls
The right art print size for a small wall is one that fills roughly 60 to 75 percent of the available width. Undersized art on a large wall reads as an afterthought; oversized art crowds the space.
Measure the wall, then measure your furniture below it. Art should generally span about two-thirds the width of a sofa, console, or bed. For a narrow wall between two doors, a single vertical piece works better than a horizontal one.
| Wall Width | Art Width (60-75%) | Best Format |
|---|---|---|
| 60 cm | 36-45 cm | Single square print |
| 90 cm | 54-68 cm | Vertical or square |
| 120 cm | 72-90 cm | Horizontal or pair |
| 150 cm | 90-113 cm | Large single or triptych |
Hang the center of the art at eye level, roughly 145 to 150 cm from the floor (moma.org).
Renter-Friendly Wall Art Ideas That Transform a Space
The fastest way to change a room without touching the walls is layering art across multiple surfaces. Renter-friendly wall art ideas work best when they treat the whole room as a gallery, not just the empty wall.
Gallery Walls Without Nails: The 3-5-7 Rule
A gallery wall without nails relies on adhesive strips and a simple layout rule. The 3-5-7 rule means grouping an odd number of pieces, three, five, or seven, so the arrangement feels balanced rather than rigid.
Lay the whole arrangement on the floor first. Photograph it, then transfer the layout to the wall using painter's tape as guides before you commit any strips.
Beyond Walls: Pillows, Textiles, and Acoustic Art
Art does not have to hang. A premium pillow with a bold print adds color and texture to a neutral sofa in seconds, and it moves with you to the next place.

Acoustic art panels are an underused option. Fabric-wrapped panels absorb sound and double as wall decor, which matters in thin-walled apartments where echo makes a small room feel hollow.
How to Decorate Rentals with Art on a Budget
Budget-friendly art usually comes down to three moves: buy prints instead of originals, frame them yourself, and rotate what you already own. A stretched canvas print needs no frame at all, which removes the single biggest cost. But the angle most guides skip is the one that saves the most money and the most waste: sourcing frames and art secondhand, and treating the frame as a reusable asset rather than a one-time purchase.
Buy the Frame Once, Reuse It Forever
The frame is often the most expensive part of a piece, and it's also the most portable. A standard-size frame, 8x10, 11x14, 16x20, can hold a rotating series of prints for years. Buy one well-made frame in a neutral finish, then swap the print inside as your taste or the season changes. That single frame can carry a wall through a dozen looks.
This is also the sustainable play. Thrift stores, estate sales, and online marketplaces are full of solid wood and metal frames priced far below new, and most can be refreshed with a coat of matte black, white, or brass spray paint. A dated gold frame becomes a modern one in an afternoon.
Secondhand and Upcycled Art Sources
- Thrift stores and estate sales: original oils, vintage prints, and framed reproductions at a fraction of retail. Check the frame's condition first, a good frame is worth more than the art inside it.
- Printable downloads: buy once, print at a local shop or at home, and reuse the file across multiple frames.
- Upcycled materials: fabric swatches, wallpaper samples, sheet music, maps, and botanical pages from old books all frame beautifully and cost almost nothing.
- Your own photography: phone photos printed at a drugstore or online lab, matted in a thrifted frame, read as intentional gallery art.
The Zero-Waste Framing Checklist
If sustainability is the goal, the frame matters as much as the art:
- Choose solid wood or metal over composite or plastic, which can't be refinished and often ends up in a landfill.
- Reuse the glass and backing from a thrifted frame rather than buying new.
- Skip the mat if you can, a mat is the most-replaced, least-reused component, and a print sized to the frame looks clean without one.
- Use acid-free backing board when you can find it secondhand; it protects the print and extends its life.
- When you move, pack frames with the art still inside. They travel better assembled than as loose parts.
Grouping and Rotation
Grouping several small inexpensive prints into one gallery wall creates more visual impact than a single costly piece. Odd numbers, three, five, seven, read as balanced, and mixing frame finishes within one color family keeps the arrangement cohesive without matching.
How to Decorate Rentals with Art for Neutral Spaces
Neutral walls are an advantage, not a limitation. A beige or white wall is a blank gallery surface, so bold color in the art carries the room.
Build around one focal point. Choose a single large piece with strong color or texture, then let smaller pieces support it. Warm tones like ochre, rust, and deep blue pop against neutral paint, while monochrome art can disappear.
For a cohesive look, repeat one color from the art in a pillow or throw. That single thread ties the room together without repainting anything.
Conclusion
The hardest part of decorating a rental is trusting that damage-free methods actually hold. They do, when you match the hardware to the wall and the weight. This Artists Dream turns visionary art into pieces built to be lived in, from gallery-stretched canvas prints like Sailing Among the Planes to shape-retaining premium pillows that move with you. Add to cart and start building a gallery you can take to your next place.

Frequently Asked Questions
What is the 3-5-7 rule in decorating?
The 3-5-7 rule is a guideline for arranging gallery walls and grouping decor. It suggests using an odd number of items, typically three, five, or seven pieces, to create visual balance. Odd numbers feel more natural and dynamic than even groupings. For rentals, this rule helps you plan a gallery wall without nails by mapping pieces on the floor first. Start with three small prints, then add larger anchors as you go. The rule works for any wall size and helps prevent overcrowding.
How can I hang art in a rental without using nails?
Adhesive strips and hooks are the most common damage-free method. For lightweight art prints, use removable adhesive strips. Always clean the wall with rubbing alcohol before applying, and press firmly for 30 seconds. Always test a small area first and follow the manufacturer's removal instructions to protect your security deposit.
What are the best renter-friendly adhesives for heavy wall art?
For heavier art, consider adhesive hooks. Damage-free strips with stretch-release tabs work well on painted drywall. Avoid using these on wallpaper or freshly painted walls, as they can pull off paint. For larger canvas prints, consider a floor easel or a leaning shelf instead. Always check your lease agreement for any restrictions on wall mounting before applying adhesives.
How do I arrange art in a small rental apartment?
In small spaces, use vertical stacking and lean art on shelves to save wall space. Choose a focal point wall and arrange a tight gallery cluster using the 3-5-7 rule. For narrow walls, hang a single large canvas print or a vertical series of three small prints. Use lightweight art prints and command hooks to avoid damage. Mirrors and acoustic art panels can also add visual interest without crowding. Measure your wall first and map the layout on paper before hanging.